Beekeeping
Methods of Introducing Queens
Brock Harpur and Krispn Given, Extension Entomology, Purdue University and López-Uribe and Robyn Underwood, Dept. of Entomology, Penn State University
If you want to view as pdf, click here
Introducing a new queen to a honey bee colony is an essential skill for beekeepers. The success of your colony depends on a healthy, well-mated queen. The process of requeening poses several challenges and risks for both the queen and the colony. The essential principle of introducing a queen into a colony is that it is queenless. A new queen’s integration depends on the acceptance and acclimation of the workers, which is not always guaranteed. Queens may be rejected, injured, or killed by the colony during the introduction process, leading to lack of brood production and, ultimately, the collapse of the colony. Overall, the introduction of new queens is a delicate process that requires careful planning and execution to minimize the risk of mortality and ensure the long-term success of the colony. This guide will walk you through the process of introducing a new queen to your colony and provide various methods for caging and releasing the queen.
How To Know If Your Queen Is Healthy Before Introduction
Ensuring a queen is healthy before introducing her to a colony is crucial for the colony’s success and productivity. A healthy queen will lay a consistent pattern of eggs, providing a strong workforce for the colony to thrive. Introducing an unhealthy queen may lead to poor brood patterns, reduced population, or even the spread of diseases and parasites, putting the entire colony at risk. A healthy queen also emits strong pheromones that help maintain social cohesion and organization within the nest, which is essential for its overall stability and functioning.
Introducing instrumentally inseminated queens into a colony can be more challenging than introducing naturally mated queens due to differences in their pheromone profiles. Instrumentally inseminated queens may produce weaker or altered pheromones compared to naturally mated queens, causing the worker bees to be less receptive or take longer to accept the new queen. This increased difficulty in acceptance may lead to a higher risk of rejection, aggression, or even the death of the introduced queen. As a result, beekeepers must take extra precautions and provide ample time for the colony to acclimate to an instrumentally inseminated queen to ensure a successful integration. If the queen is instrumentally inseminated, ensure she was inseminated by a reputable breeder with the desired genetic traits.
If your queen was shipped to you in the mail, whether singly, with a small cohort of workers, or as a nuc, you should be aware that they may have experienced significant temperature variations in transit. Recent research has demonstrated that extreme temperature variation can stress queens and cause reduced fertility, diminished pheromone production, and even premature death. These factors, in turn, negatively impact the overall health and productivity of the receiving colony. The successful integration of a healthy queen is crucial for a thriving colony, as it ensures the production of strong and genetically diverse offspring. When shipping queens, ask your supplier how they prepare for extreme temperatures during shipment.
Physical appearance
• The queen should be larger than worker bees, with a longer and more rounded abdomen. (Figure 1)
• Her wings should be intact and well-formed, without any damage or deformities.
• Her legs should be strong, allowing her to move freely and confidently.
• Inspect the queen’s tarsi and pads for loss or injury from banking. The foot pads should be pearly white.
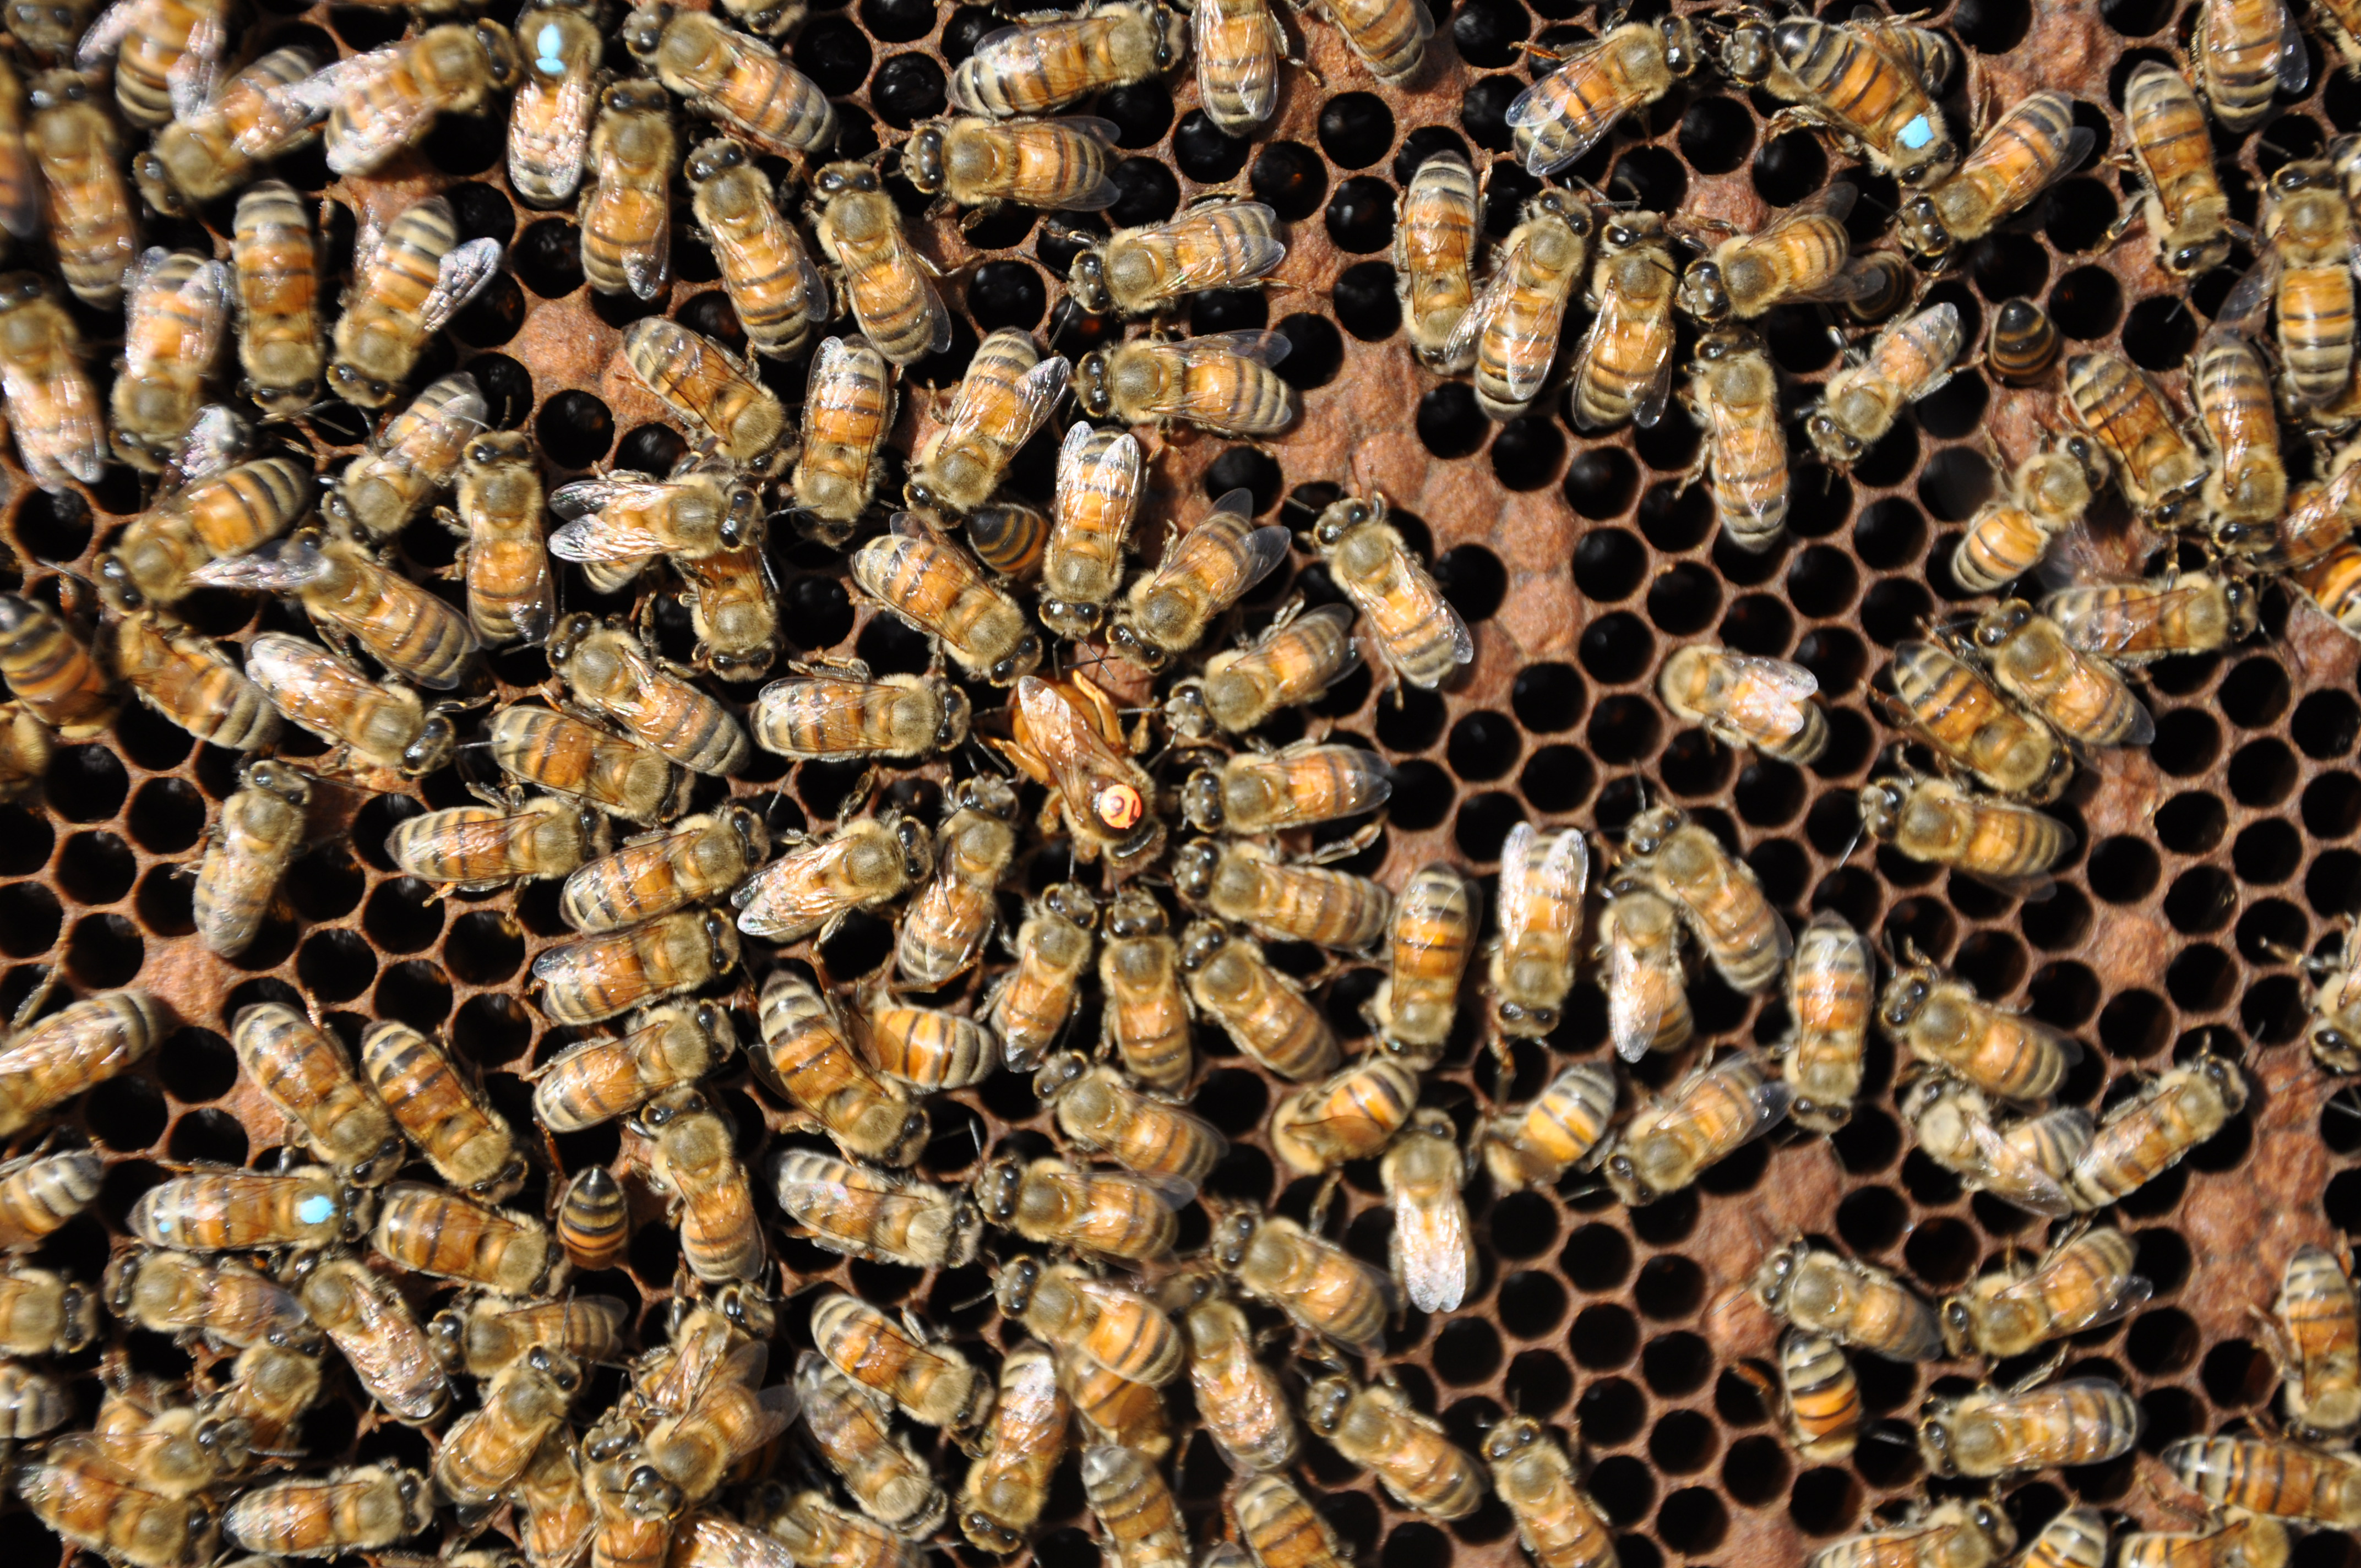
Figure 1. Healthy queen depositing an egg with her retinue of worker bees. (Photo Credit: Krispn Given)
Behavior
• The queen should be active and responsive when gently prodded, exhibiting a strong will to move.
• She should not exhibit signs of lethargy or weakness, which could indicate illness, dehydration, hunger or stress.
Absence of diseases and parasites
• Examine the queen for signs of diseases or parasites, such as deformed wings (a sign of Deformed Wing Virus) or the presence of Varroa mites.
• If you receive a queen from a supplier, ensure the supplier has a good reputation for providing healthy queens.
Preparing The Colony For The New Queen
• Remove the old failing queen or confirm her absence if the colony is queenless.
• Remove any queen cells to prevent the colony from raising a new queen.
• Allow the colony to remain queenless for about 24 hours to recognize the absence of their queen.
• It is best to introduce a new queen into a small colony, such as a recent split or nuc.
• Young bees accept new queens more readily than old bees, so it is best to make a split, allow the old foragers to return to the parent colony and let the split sit queenless for about 24 hours.
• Introductions to large colonies work but success can be more variable.
• Queens may need to be replaced if they start to fail or have been injured by the beekeeper. For example, when the beekeeper is removing a frame, the queen may be rolled between the two combs resulting in mortality or she may be injured unable to lay eggs properly in the cells.
• Queens can be successfully introduced anytime during the spring, summer or even fall but may be more difficult when resources are limited. If you need to requeen a colony during a time of dearth provide the colony with 1:1 sugar syrup before and during introduction to simulate a nectar flow. This will make the introduction process more successful.
Introducing a Queen by Direct Release
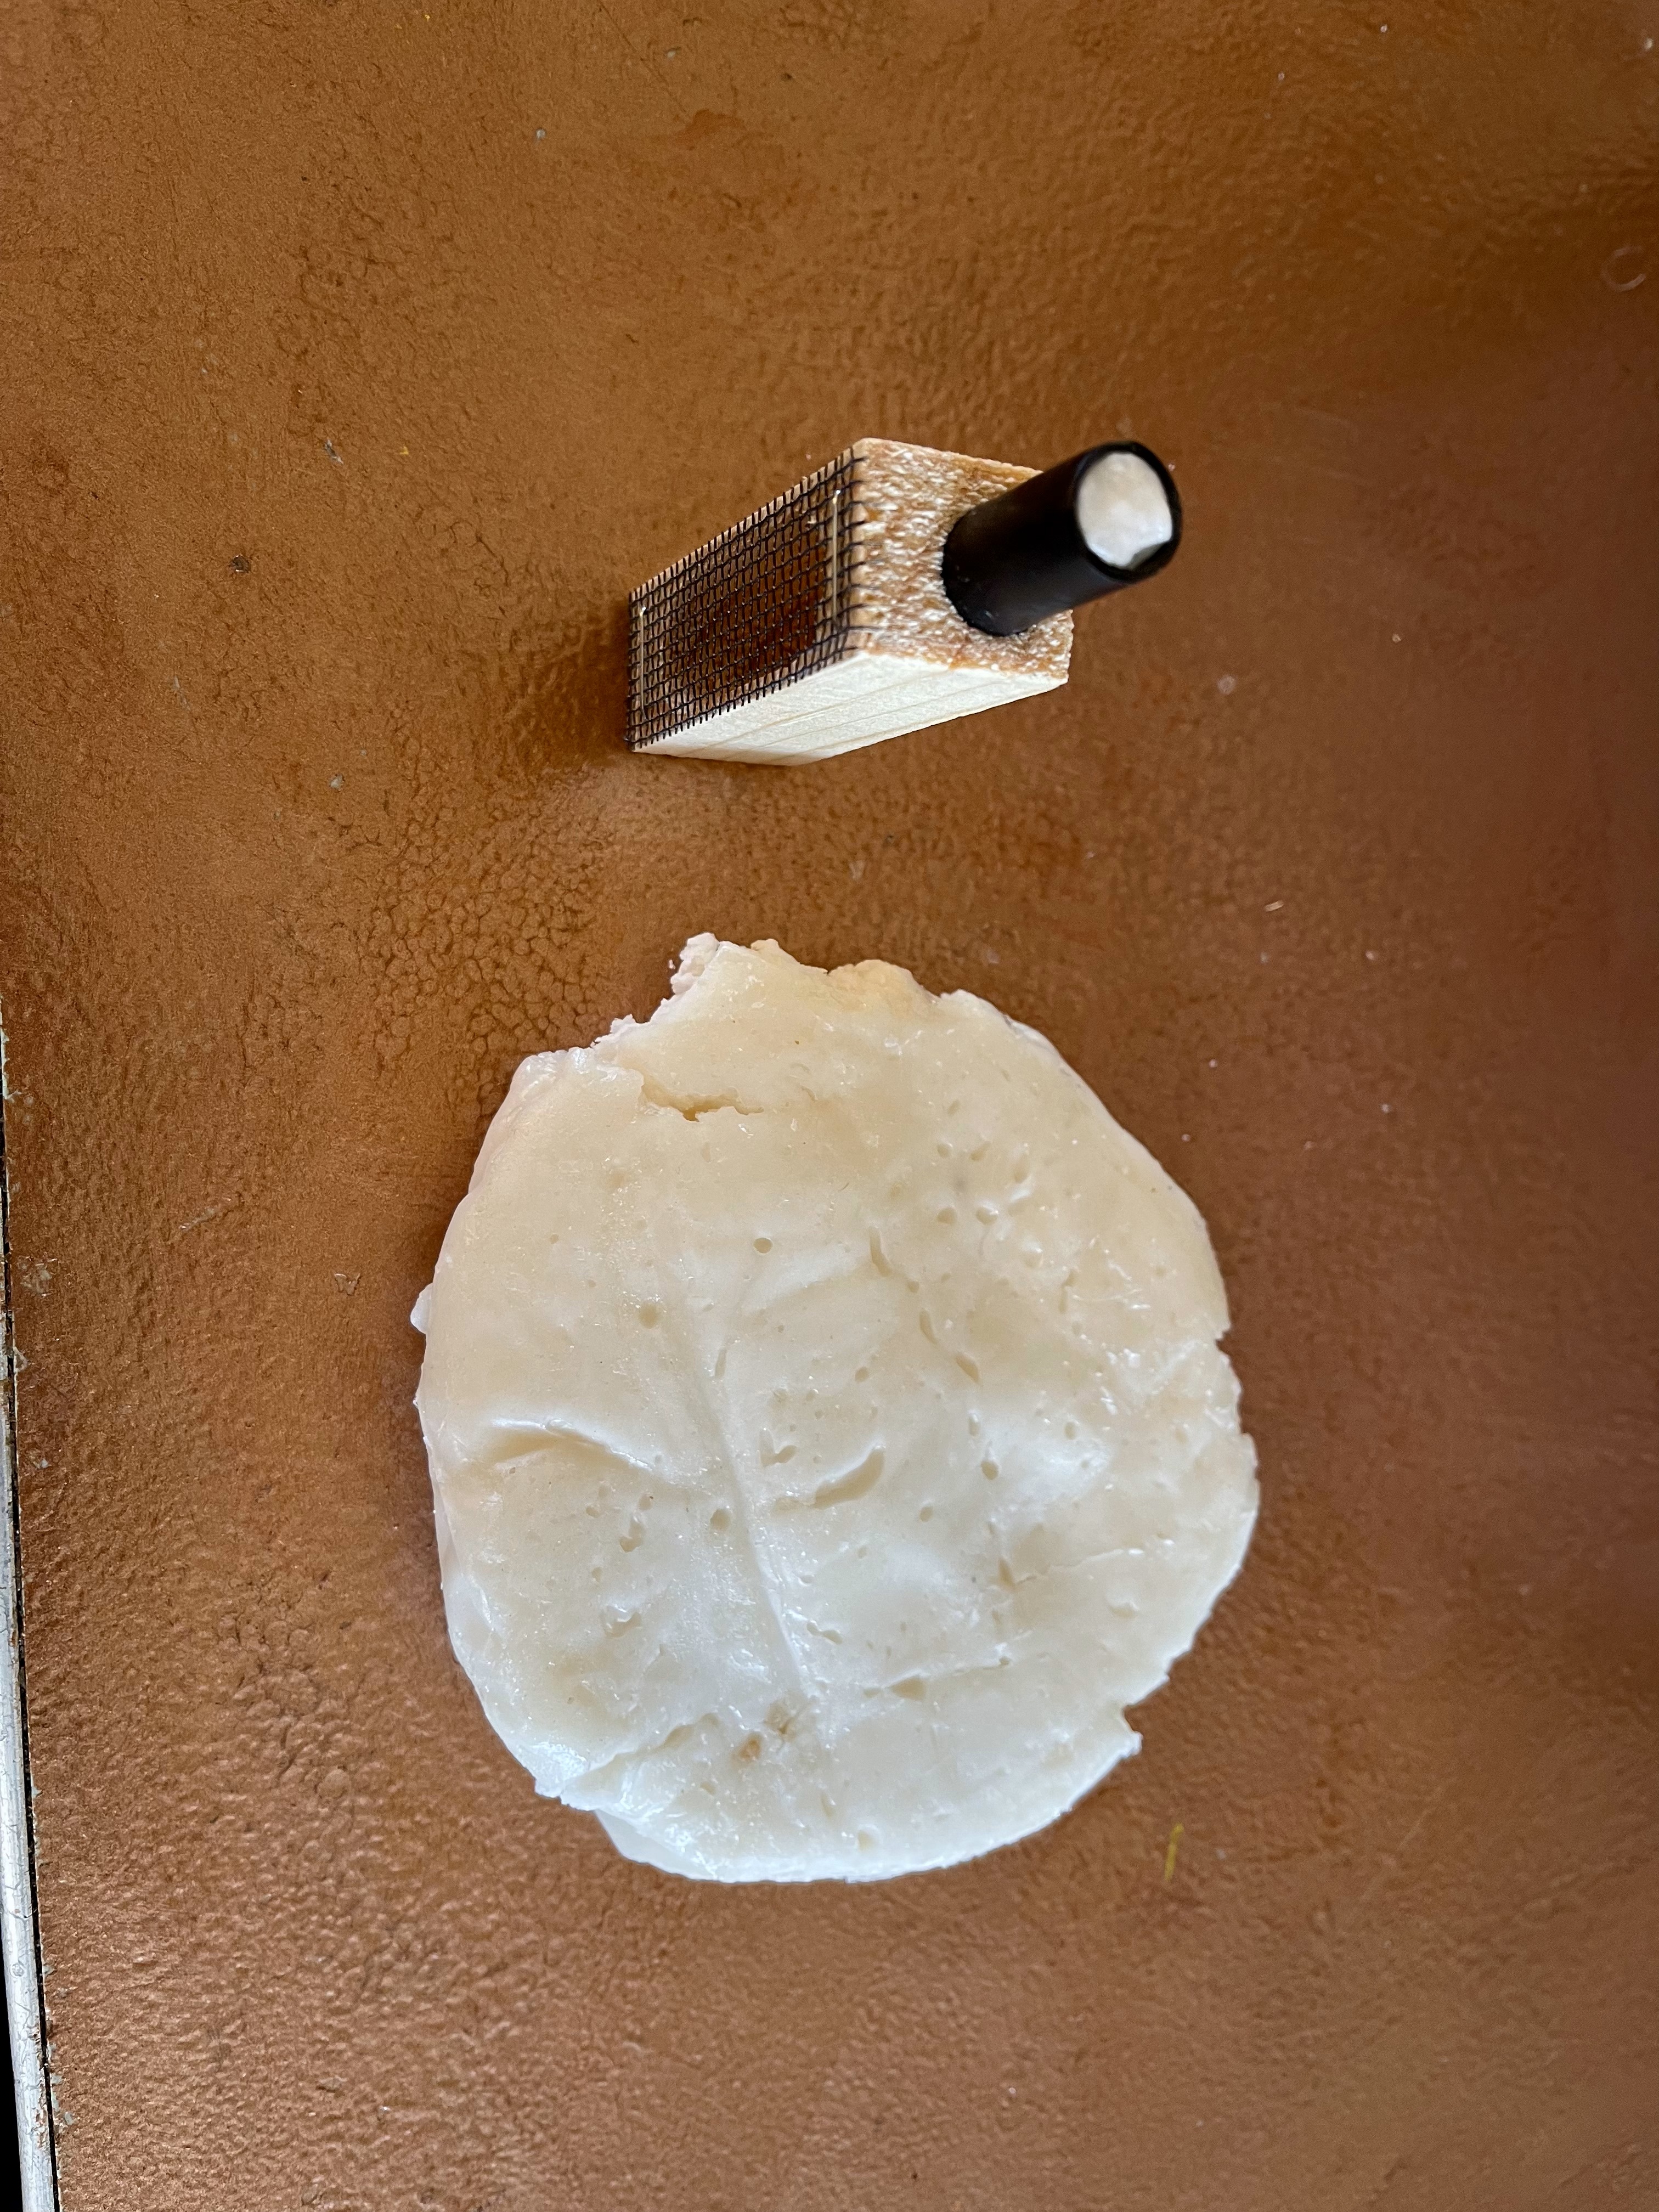
Figure 2. Freshly made queen candy placed in a California mini cage. (Photo Credit: Krispn Given)
• After this period, release the queen by removing the cage’s closure.
• It’s important to use cages that have an area where the queen can escape from the workers; this is essential when antagonistic bees are balling the cage or biting it. Loss of tarsal pads and claws may result from aggressive bees otherwise. (Figure 3)
• If the bees have their mandibles clamped onto the cage, it will be difficult to dislodge them with your finger. Never release a queen if workers are biting the cage.
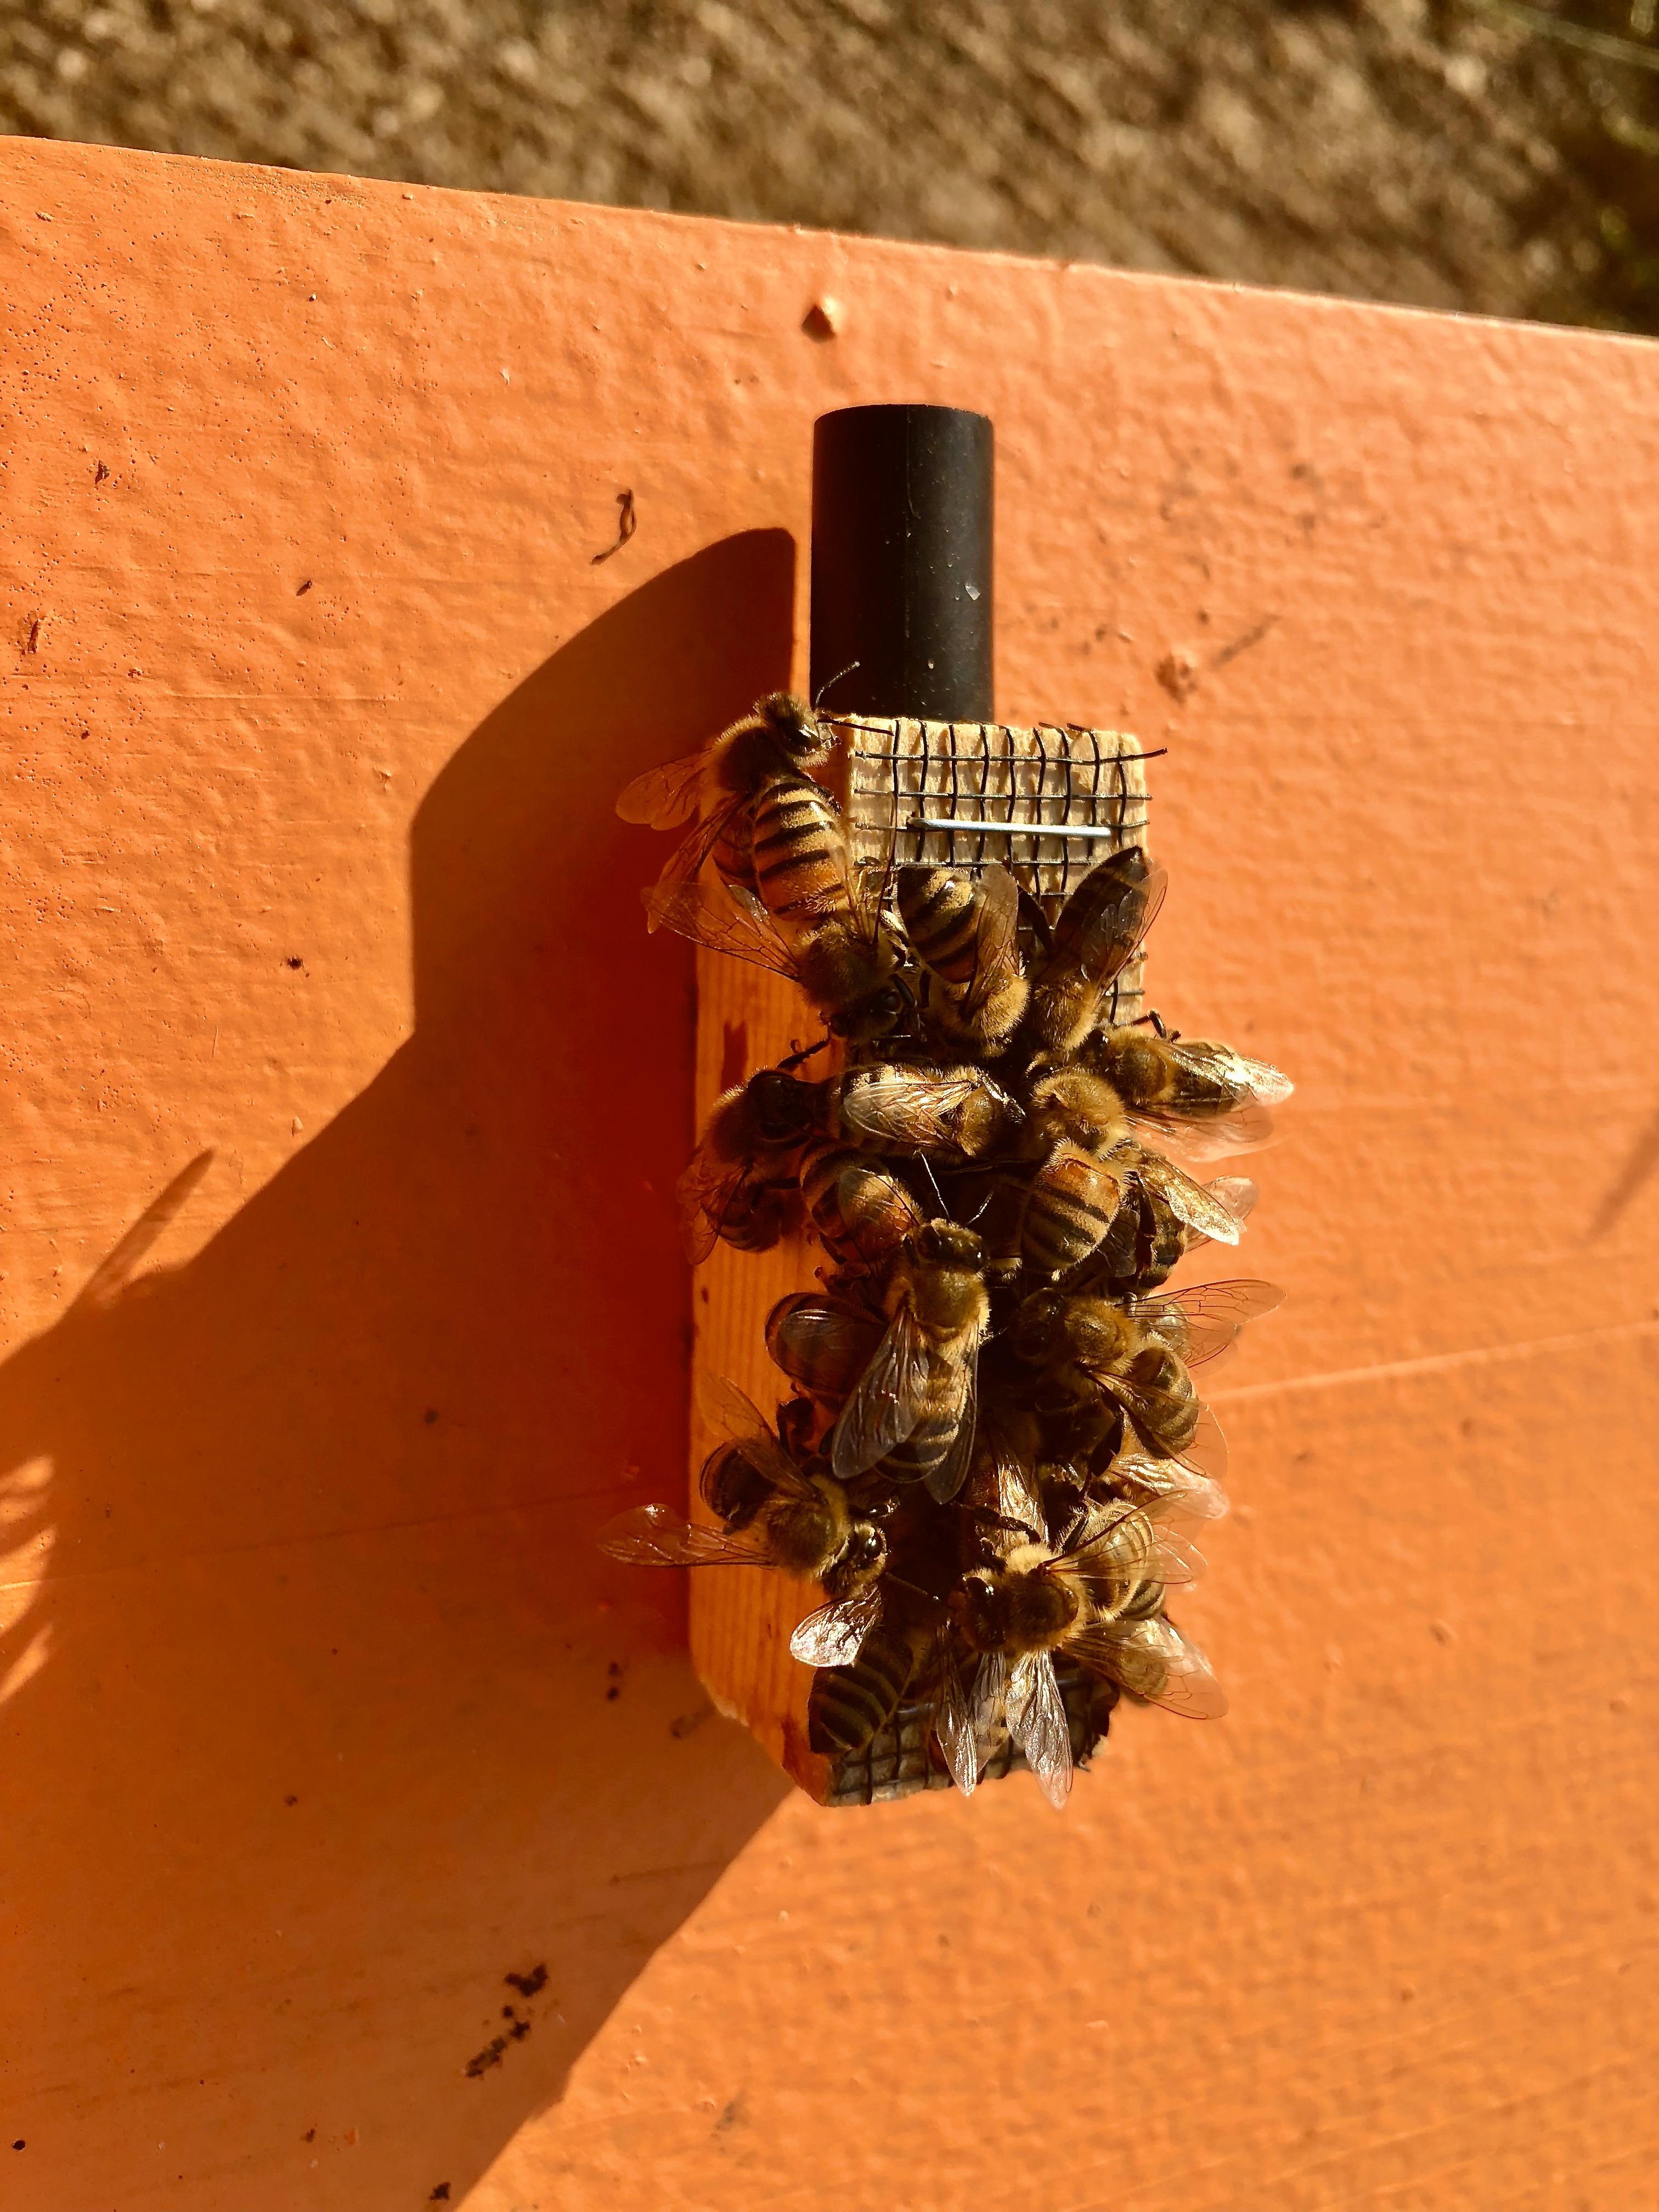
Figure 3. Cage biting bees indicating non-acceptance. (Photo Credit: Krispn Given)
Introducing A Queen Using A Candy Plug
You can use the method above but have the workers chew through a queen candy plug and naturally release the queen.
Queen Cage Candy Recipe
• 1 cup of honey
• 2 pounds of powdered sugar
• Place the new queen in a cage with a tube filled with queen candy. (Figure 4 a, b, c, d)
• Suspend the cage between the frames in the brood area, with the candy tube accessible to the worker bees.
• The worker bees will chew through the queen candy, releasing the queen over the course of 2-4 days.
• If you wish to prolong the queen’s time in the cage, cover the candy plug with a cap (see image) or tape for 1-2 days, then remove it so the bees can naturally release her after that.
• Monitor the cage and ensure the queen has been released. If not, manually release her after 4 days.
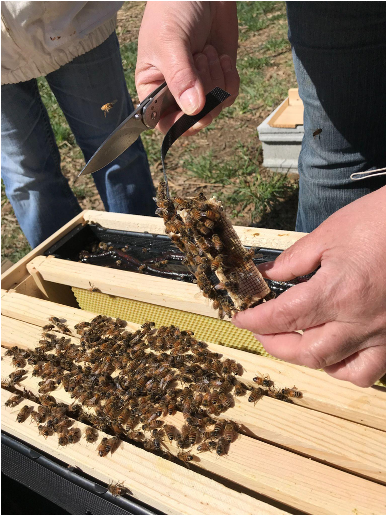
Figure 4a. Candy cage with suspension strip. (Photo Credit: Robyn Underwood)

Figure 4 (b, c). Placing the queen cage into the queenless colony with cage front facing down. Slightly angle the candy end towards the bottom. (Photo Credit: Krispn Given)
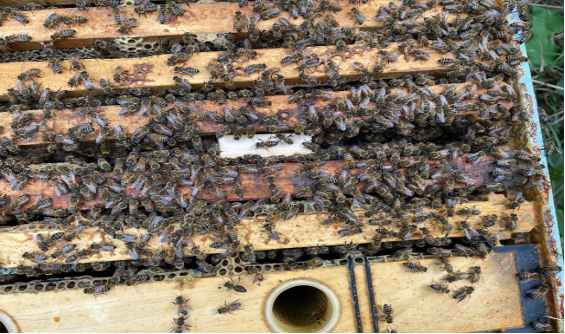
Figure 4 (b, c). Placing the queen cage into the queenless colony with cage front facing down. Slightly angle the candy end towards the bottom. (Photo Credit: Krispn Given)
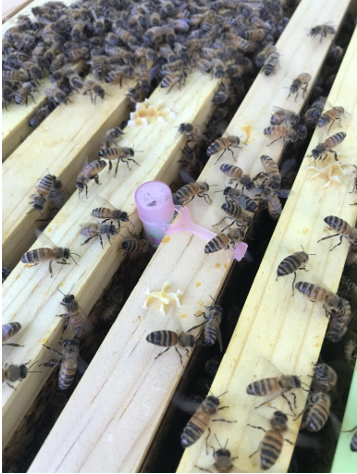
Figure 4d. JZBZ cage with cap hanging between frames. (Photo Credit: Robyn Underwood)
Butler Cage Introduction
• Transfer the queen into a Butler cage, on her own (without her attendants). (Figure 5)
• The open end of the cage can be either plugged with fondant or covered with newspaper held on by an elastic band.
• Wedge the cage firmly between two frames of brood (horizontally or vertically is fine), as this is where bees within the hive would most naturally expect to find their queen.
• Inspect the colony in 4-6 days. By this time the queen should have been released from the cage, be established in the hive, and show evidence of good laying.
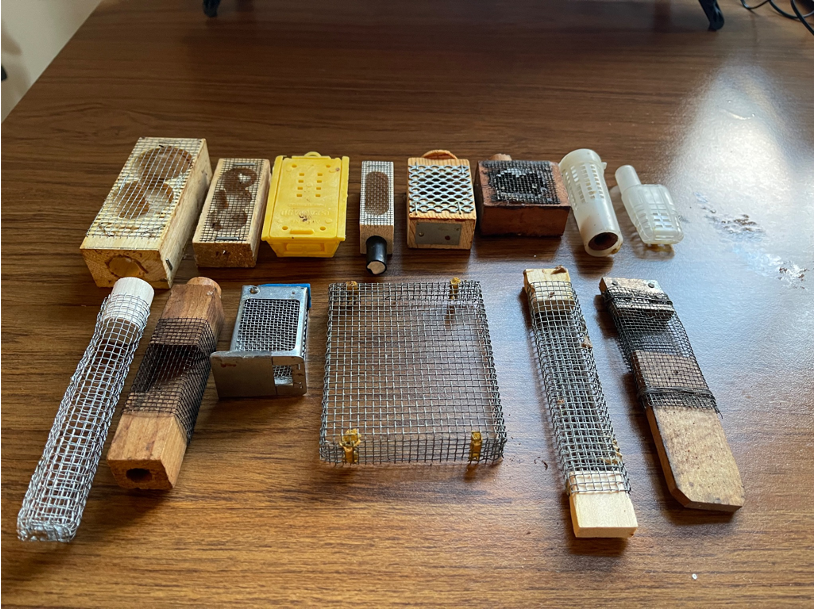
Figure 5. Various queen cages are available or can be made. Top to bottom: Jumbo Benton, standard three hole Benton, Plastic Butler style, California mini, Alley, Antique original Alley, Nicot plastic hair roller cage, Plastic JZ’s BZ’s, 8 mesh hardware cloth cigar cage, Antique Miller cage, Russian metal queen cage, 8 mesh wire push in cage, 8 mesh wire Butler cage and an antique Butler cage. (Photo Credit: Krispn Given)
Push-in Cage
The advantage of a push-in cage is that it allows the queen to begin laying eggs before she is released.
• Make a rectangular 3-by-5-inch cage to push into the midrib of the comb with the queen underneath. It should be made out of 8 mesh hardware cloth (eight openings per inch). This method works best and is often used when introducing artificially inseminated queens. When done properly, it is the safest method.
• You can also buy plastic push-in cages that work well, because the bees are less likely to chew around the edges and enter the cage.
• Shake the bees off of a comb that is fairly dark (they are stronger). Place the cage in an area with a little open nectar or honey and (preferably) over a small patch of emerging brood so the bees that emerge will tend her. You MUST make sure that the push-in cage is pressed in firmly.
• Check the cage in 3 to 5 days to make sure the bees have not chewed underneath. If they are beginning to do this, you must move the cage.
• Once the queen is laying eggs or you are satisfied that the bees are not biting the cage (refer to previous comment about this), you may release the queen directly.
Direct Methods Of Introduction (Advanced Methods)
Several methods of requeening a colony without the use of cages are used successfully by experienced beekeepers.
Transfer Directly To A Brood Comb
Only attempt this method if you have a calm, gentle colony and the queen is already well-mated. This method is generally not recommended.
• Open the hive and locate a frame with open brood.
• Gently remove the queen from her shipping cage, taking care not to injure her or her attendants.
• Place the queen on the frame with some open brood, allowing her to walk directly into the colony. When directly releasing caged queens it is a good idea to spray the queen and bees lightly with a 1:1 sugar syrup. This improves introduction.
• Carefully close the hive, making sure not to crush the queen or any worker bees.
Smoke Introduction Method
After a colony has been made queenless the new queen is run in the entrance followed by a few puffs of cool, dense smoke. This method works best when introducing an egg laying queen taken from its nucleus colony. Feeding the colony is suggested if there is a dearth period.
Monitoring The Colony After Introduction
• Check the colony 5-7 days after the queen’s release for signs of acceptance, such as new eggs and larvae.
• If the queen is not accepted, the colony may become aggressive, or you may find the queen dead.
• If the queen is not accepted, repeat the process with a new queen, using a different introduction method.
• If she is accepted, evaluate her brood pattern. A healthy queen will have a consistent, tight brood pattern with few empty cells.
• The presence of eggs, larvae, and capped brood in various stages of development indicates that the queen has been laying eggs regularly.
Hint: Make sure the colony does not have an unmated queen already present.
Important: Substitute corn syrup or invert syrup for use outside your apiary or when selling candy-caged queens to the public! This eliminates the possibility of the spread of disease like American Foulbrood to other apiaries from infectious spores that may be in the honey you are using to make the candy.
• Warm the honey or other liquid sugar to 95°F. Pour it into a clean mixing bowl and start adding powdered sugar. Stir. Keep adding powdered sugar until the mixture becomes a dough that you can knead.
• If it cools too quickly and becomes hard to work, you can again heat it to 95°F and keep adding sugar.
• The final product should be firm, not loose. When pulled and torn, it should have rough edges. If too soft, it will leak out of the cage. If too firm, it may be too difficult for the bees to remove quickly.
Other Tips And Tricks
• Spraying a simple 1:1 sugar syrup on the workers in the hive before introducing the new queen will distract them. To make the 1:1 sucrose syrup add (l lb. of white sugar to 1 lb. of water). Mix thoroughly with warm water until the crystals are completely dissolved.
• As a general rule, unmated queens are more difficult to introduce into established colonies than mated queens.
• If you suspect a colony has been queenless for a while, inspect for laying workers. You will see poorly centered eggs, and often multiple eggs in a cell. These colonies are very difficult to re-queen.
• Most common reasons a queen is rejected.
- The colony is not actually queenless.
- The colony has been queenless longer than the beekeeper realized.
- There were queen cells in the hive at the time of introduction.
• Whichever method you use, the queen should be visually inspected after introduction whenever possible to ensure she has not been injured.
Acknowledgements
Thanks to Garett Slater, Dale McMahan, and Dave Shenefield for comments on an initial draft.
This research was supported by a USDA Critical Agricultural Research and Extension: (CARE) award (2020-68008-31409).
READ AND FOLLOW ALL LABEL INSTRUCTIONS. THIS INCLUDES DIRECTIONS FOR USE, PRECAUTIONARY STATEMENTS (HAZARDS TO HUMANS, DOMESTIC ANIMALS, AND ENDANGERED SPECIES), ENVIRONMENTAL HAZARDS, RATES OF APPLICATION, NUMBER OF APPLICATIONS, REENTRY INTERVALS, HARVEST RESTRICTIONS, STORAGE AND DISPOSAL, AND ANY SPECIFIC WARNINGS AND/OR PRECAUTIONS FOR SAFE HANDLING OF THE PESTICIDE.
April 2024
It is the policy of the Purdue University Cooperative Extension Service that all persons have equal opportunity and access to its educational programs, services, activities, and facilities without regard to race, religion, color, sex, age, national origin or ancestry, marital status, parental status, sexual orientation, disability or status as a veteran. Purdue University is an Affirmative Action institution. This material may be available in alternative formats.
This work is supported in part by Extension Implementation Grant 2021-70006-35390/ IND90001518G-1027053 from the USDA National Institute of Food and Agriculture and NCR SARE Award GNC20-311.
765-494-8491
www.extension.purdue.edu
Order or download materials from www.the-education-store.com